The Big Ol’ Guide To
The Daybreak Player Studio Program allows player like you and me to design and create items to be sold in multiple Daybreak Games. A small note, but this guide will focus only on creating items for Planetside 2. Most of the overarching ideas carry over between games, but just keep that in mind.
Table of Contents:
Resources:
Putting these here right away just so they are easy to find. I will also have the links contained in the relevant parts of the guide itself.
Planetside 2 Player Studio site (Note, some things are innacurate/outdated)
PS2 Test Client (Contains PSView and High Res Texture Files)
Software
Websites
PS Viewer Guide by EonNebula
Example UV Sets by Bishop
Detail Select Color Keys by Steveo
Unwritten Rules by Syrah
Polycount limits by Arctorn
What is Player Studio?
Player Studio is a program run by Daybreak Games that allows anyone to create and submit content for use in their games. Essentially, you come up with an idea for an item that you would like to see in the game, and design it. You then send that item to DBG, and if it meets their criteria, it’ll go up for sale in the marketplace in the game.
This is a great way to get involved with your favorite games, learn a new skill or hone existing ones, or simply make a bit of cash. However, it’s not an easy task. There’s a lot that goes into creating an item- it’s a pretty lengthy process that will take some time when you first get started. However, the more you do, the quicker and easier it gets. My first item took multiple months, but now I can complete one in a few days to a week. I hope to write this guide to streamline that process, and help you avoid common problems.
What can you make?
So, this is all cool, but what exactly can you make? There are a few categories of items that are available by DBG that they have the resources and back end to process. They can be found on the submission page in the Player Studio site.
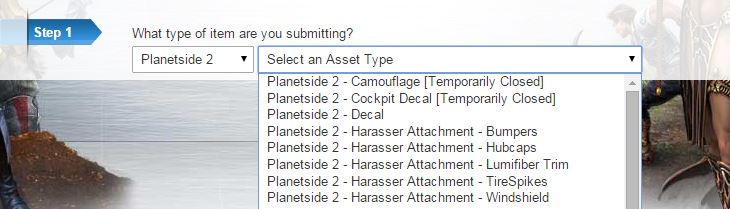
At the time of writing, the following items are available:
Currently Being Accepted
|
Not Being Accepted
|
Note that there are a few closed categories, such as camo, hood ornaments, and knives. There are a few reasons why a section is closed- for instance, camos have been closed due to a backlog of submissions, and they don’t have a way to process knives yet. Check every once and a while to see if a new section has opened, or if another closed.
Empire Traits
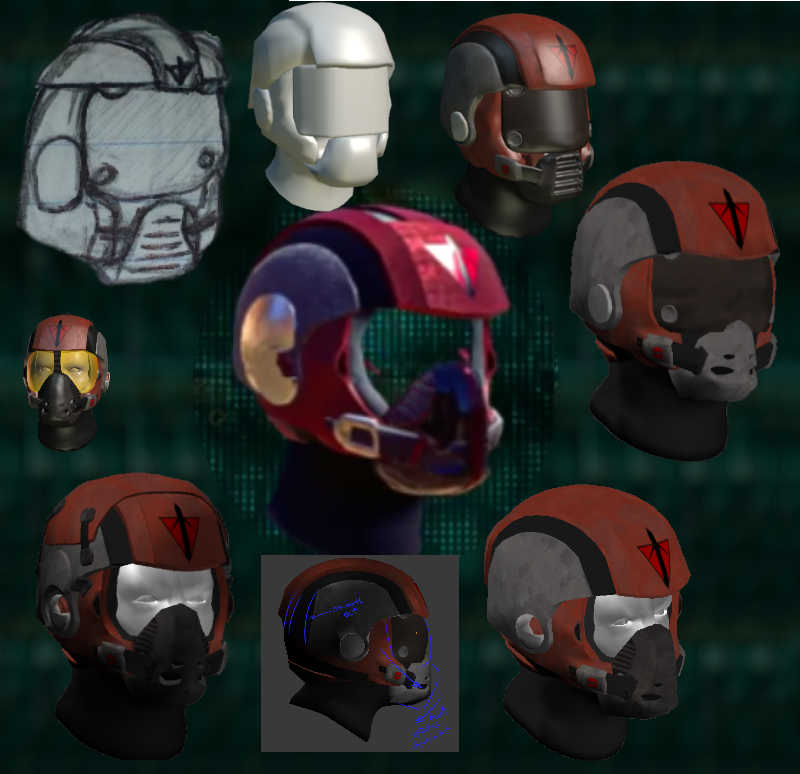
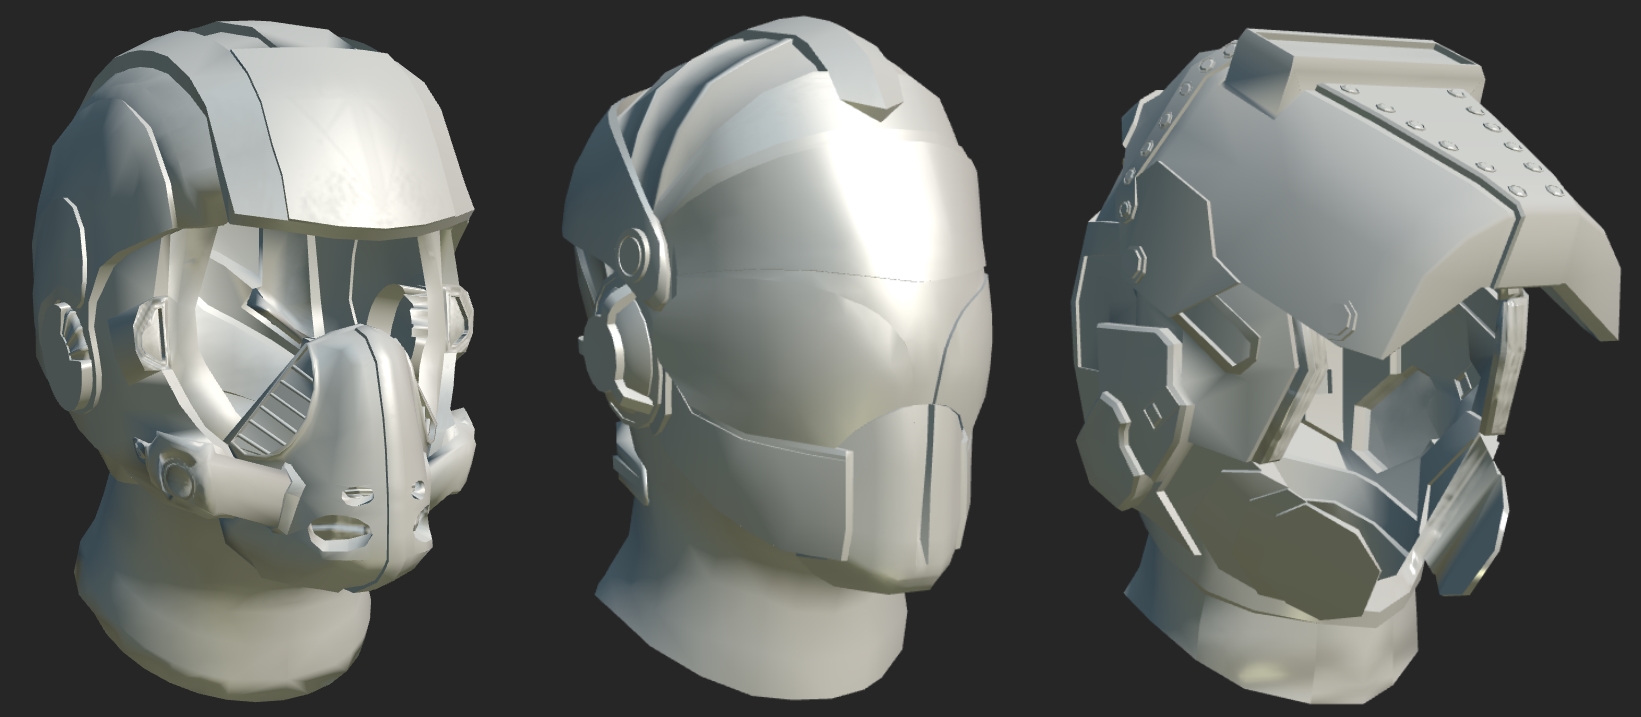
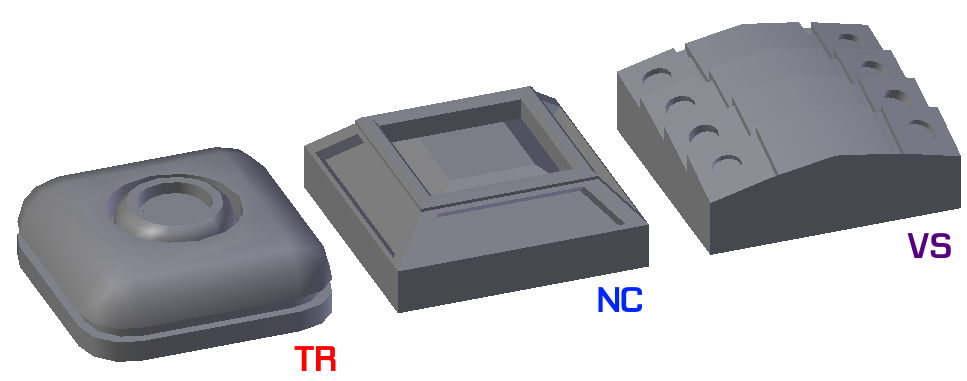
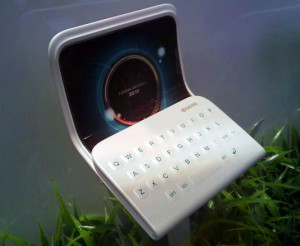
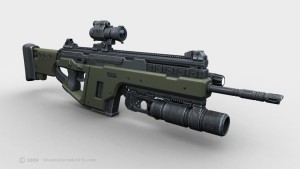
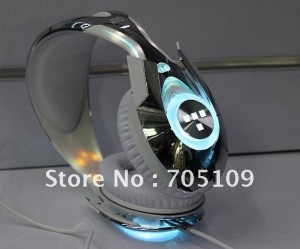
In Planetside 2, you have the three empires fighting each other. And just as their philosophies, guns, and vehicles differ, do does their “design language.” When you design an item, you want to be able to tell what faction it is for without any team colors on it.
Take a second and guess the empire for each one, then scroll down.
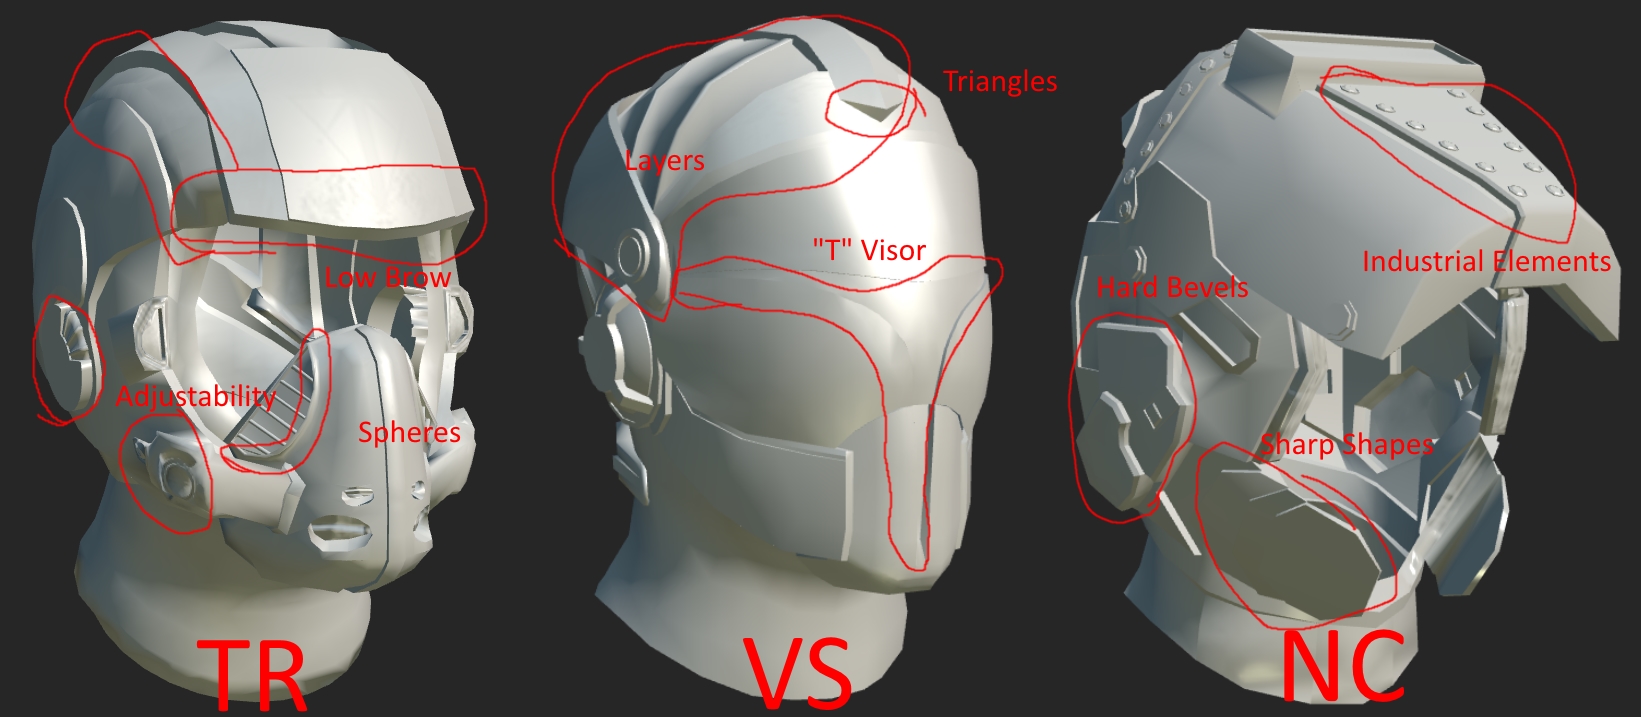
These are the design and shape languages that set the factions apart. Now, these aren’t strict rules, but rather guidelines. You can borrow elements from other factions, but this helps identify the team quickly, especially when camo is applied.
Below are a few more specific comparisons to help get a feel for the empires:
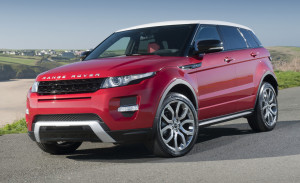
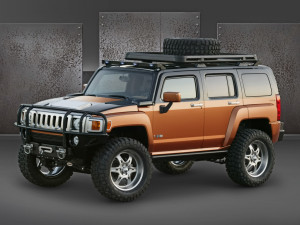
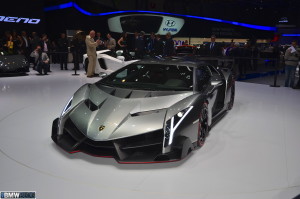
Real life examples: (Via Ex-Creative Dircetor Tramell Ray Issac)
TR |
NC |
VS |
 |
 |
 |
 |
 |
 |
Design Proccess
So, you now have a general idea of what you want your item to look like? Well, now it’s time to start modeling, right?
Nope. The first step, especially for your first item, is it sketch it out. It doesn’t matter if you draw worse than a one-year-old, just get your idea out of your head and onto paper. Doodle it on a napkin, in the side of your notebook, it doesn’t matter. This saves you a ton of effort down the road, not just as a reference for you, but for anyone critiquing or helping along the way. It can look really, really cool in your head, but we cant read your thoughts. Yet.
After that, THEN start modeling. Use the program of your choice. If you’re already comfortable with something, use that- but for the sake of this guide, I’ll be using blender. It is a free, open-source 3D modeling program. I consider it the most powerful free option out there, and you can do everything you’ll need.
NOTE: I will not be writing a guide on using Blender, or the basics of 3-D modeling. First off, I am nowhere near qualified to do so. There are plenty of guides that are far better than anything that I could hope to write. I will be sharing the parts of the process that are specific to player studio. Now, you don’t have to be proficient in 3D before you start- I actually learned (and am still learning) by doing work in the Player studio. But be prepared for a lot of googling and some tutorial videos.
Importing FBX
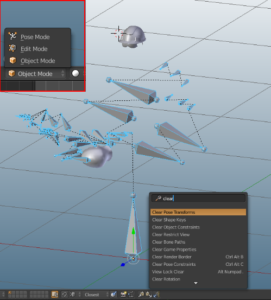
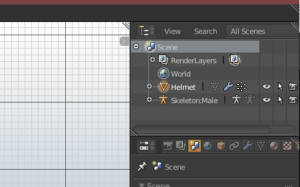
You’ll need to download the sample geometry from DBG to get started. These are the empty bodies and tanks that your items will go around. Note that they will be downloaded with bones, which will cause them to act odd in Blender. I find it’s easiest to delete the bones when working on the geometry, then re-add them when I’m completely done.

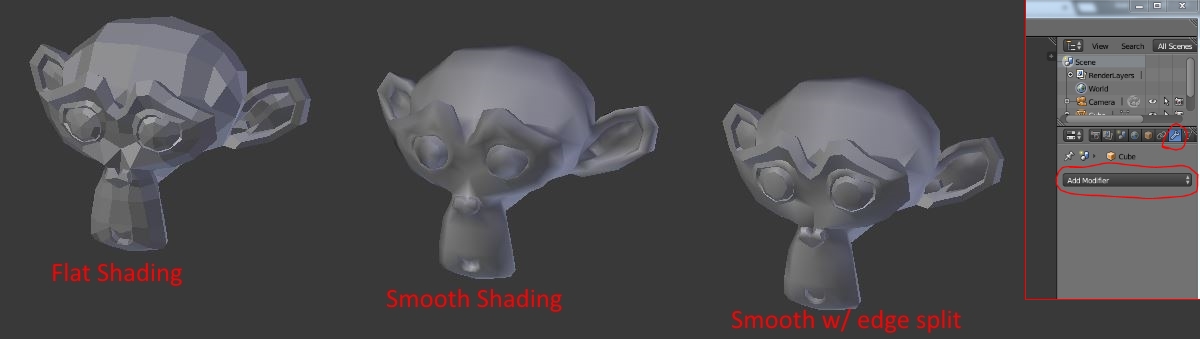
Smoothing Groups
Next, we want to define what parts of the geometry are smooth, or sharp edges. By default, a new object will be shaded solid. This does not look how you want generally. So, first you want to go into the object view,and select shade smooth. (Right click > tab > w > shade smooth)
Next, you need to define where the hard edges go, otherwise everything looks smooth and mushy. The easiest way to do this is to add a edge split modifier while you are working. (You’ll want to fix this with microbevels/auto smooth once your done.) This is found in the modifier tab on the right.
Once your geometry is close final, or you need a specific hard edge, you have two ways of going about it.
Auto Smooth and Mark Sharp
To more accurately control your sharp edges, you can mark edges to be sharp. Simply select edges or verticies that you want hard, and press ctrl > e > mark sharp.
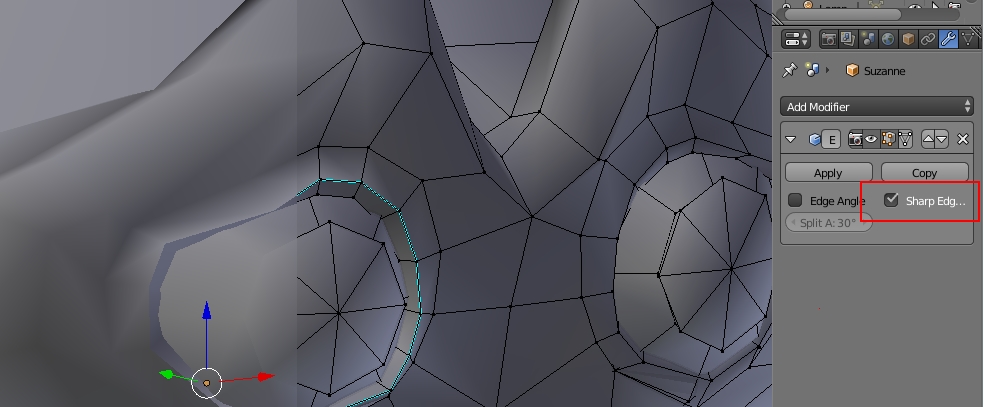
Next, in the mesh options, select the auto-smooth option. You’ll want this to be the only method of hard edges in your final geometry, so be sure to remove your edge split modifier from earlier if you used it.
Microbelevels
The best option for adding these hard edges is to create a microbevel. It is a very small bevel that will give the effect of the hard edge, without actually splitting the geometry. This is much less resource intensive in game, but is very expensive in terms of polycout. If you have a lot of leftover polys, this is the preferred method.
To add a micro bevel, you follow the same process of selecting the edges, but then you press ctrl +b, and scale until it is small enough to give the hard edge.
Poly/Triangle Count Limits

- Decals- N/A
- Harasser Attachments
- Bumpers- 1500
- Hubcaps- 3000
- Lumifiber- 1500
- Tire Spikes- 6000
- Windshields- 1300
- Helmets- 6000
- Lightning Attachments
- Lumifiber- 1500
- Armor- 2500
- Turrets (Cosmetic)- 3250
- Flash Attachments
- Bumpers- 1500
- Hubcaps- 3000
- Lumifiber- 1000
- Tire Spikes- 8000
- Sunderer Attachments
- Bumpers- 2200
- Hubcaps- 4000
- Lumifiber- 1500
- Tire Spikes- 12000
- Armor (Cosmetic)- 1500
- MBT Attachments
- Lumifiber- 1500
- Armor- 2500
- Turret (Cosmetic)- 3250
Note that these are the values defined by the submission process. If your item does not have a category, such as aircraft armor, submit it under Sunderer/Flash Tire Spikes category, as it has the highest triangle limit.
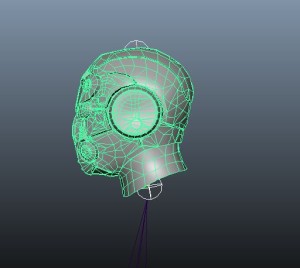
Neck Loops
If your helmet has a neck sock/sleeve, it is very important to have at least three continuous loops of vertices within it. This makes sure that it moves in a similar way to the player head.
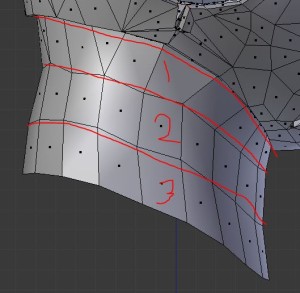
“Flatness”
One thing that is important to making your model unique is to make it visually interesting. You have a very high polycount limit, so make sure to use it! You can use the texture sheet for small details on occasion, but you should not rely on it. Try to make sure that each section is distinct from the others, even without textures.

Image via Arctorn
Additional Blender Plugins
Courtesy of Faven
Loop tools: File > User Preferences > Addons > Mesh: LoopTools
Very powerful menu accessed with the w hotkey. Can flatten sections, bridge loops, and smooth curves.
Loop tools: File > User Preferences > Addons > Mesh: UV Squares
Accessed in the UV editing menu, helps position textures in manageable square patterns. Useful for loops or using edge areas of the texture sheet.
Feedback
Gonna throw this in here now, because it’s important before you get too far. Feedback is an integral part of working in the Player Studio. Good designs can be made by yourself in a day, great designs take time and a lot of eyes, especially when you are starting out.
There are a few places to get feedback on your designs:
- Player Studio Forums
- 3D Communities
- Local groups/outfits
Be sure to try out whatever you’re comfortable with. But remember your audiences- while the Player Studio forums are good for all steps in the process, you won’t want to post early designs or gray boxes to reddit unless it’s a special reason.
Another thing to note is you may get feedback from DBG employees, especially in the art department. While you can generally pick and choose from other areas of feedback, you really want to listen to what they have to say ;).
P3D
P3D is a 3d model sharing website. I highly recommend including it any time you want to show your model to anyone. Players get to see a full view, and any Player Studio people get to carefully inspect your model without asking for thousands of screenshots.
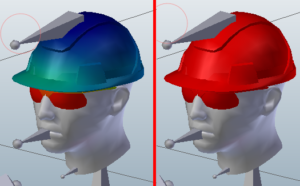
It can also be very useful for you- there’s a material called x-ray, that helps see how the helmet will sit on the head.
Textures
This is where the fun starts. When you work with player studio, you are required to work with the supplied texture files from DBG. This saves memory in the game, but could make this process much easier or harder for you. Easier for me, because I can’t make textures worth anything, but it is occasionally harder because of size and color constraints. However, the provided textures are extremely powerful, if you use them correctly.
There are three types of UV maps that you will be working with on your model.
map1
UV 1 controls color maps, tinting, normals, and a bunch of other maps. Essentially, it controls the location of the textures.
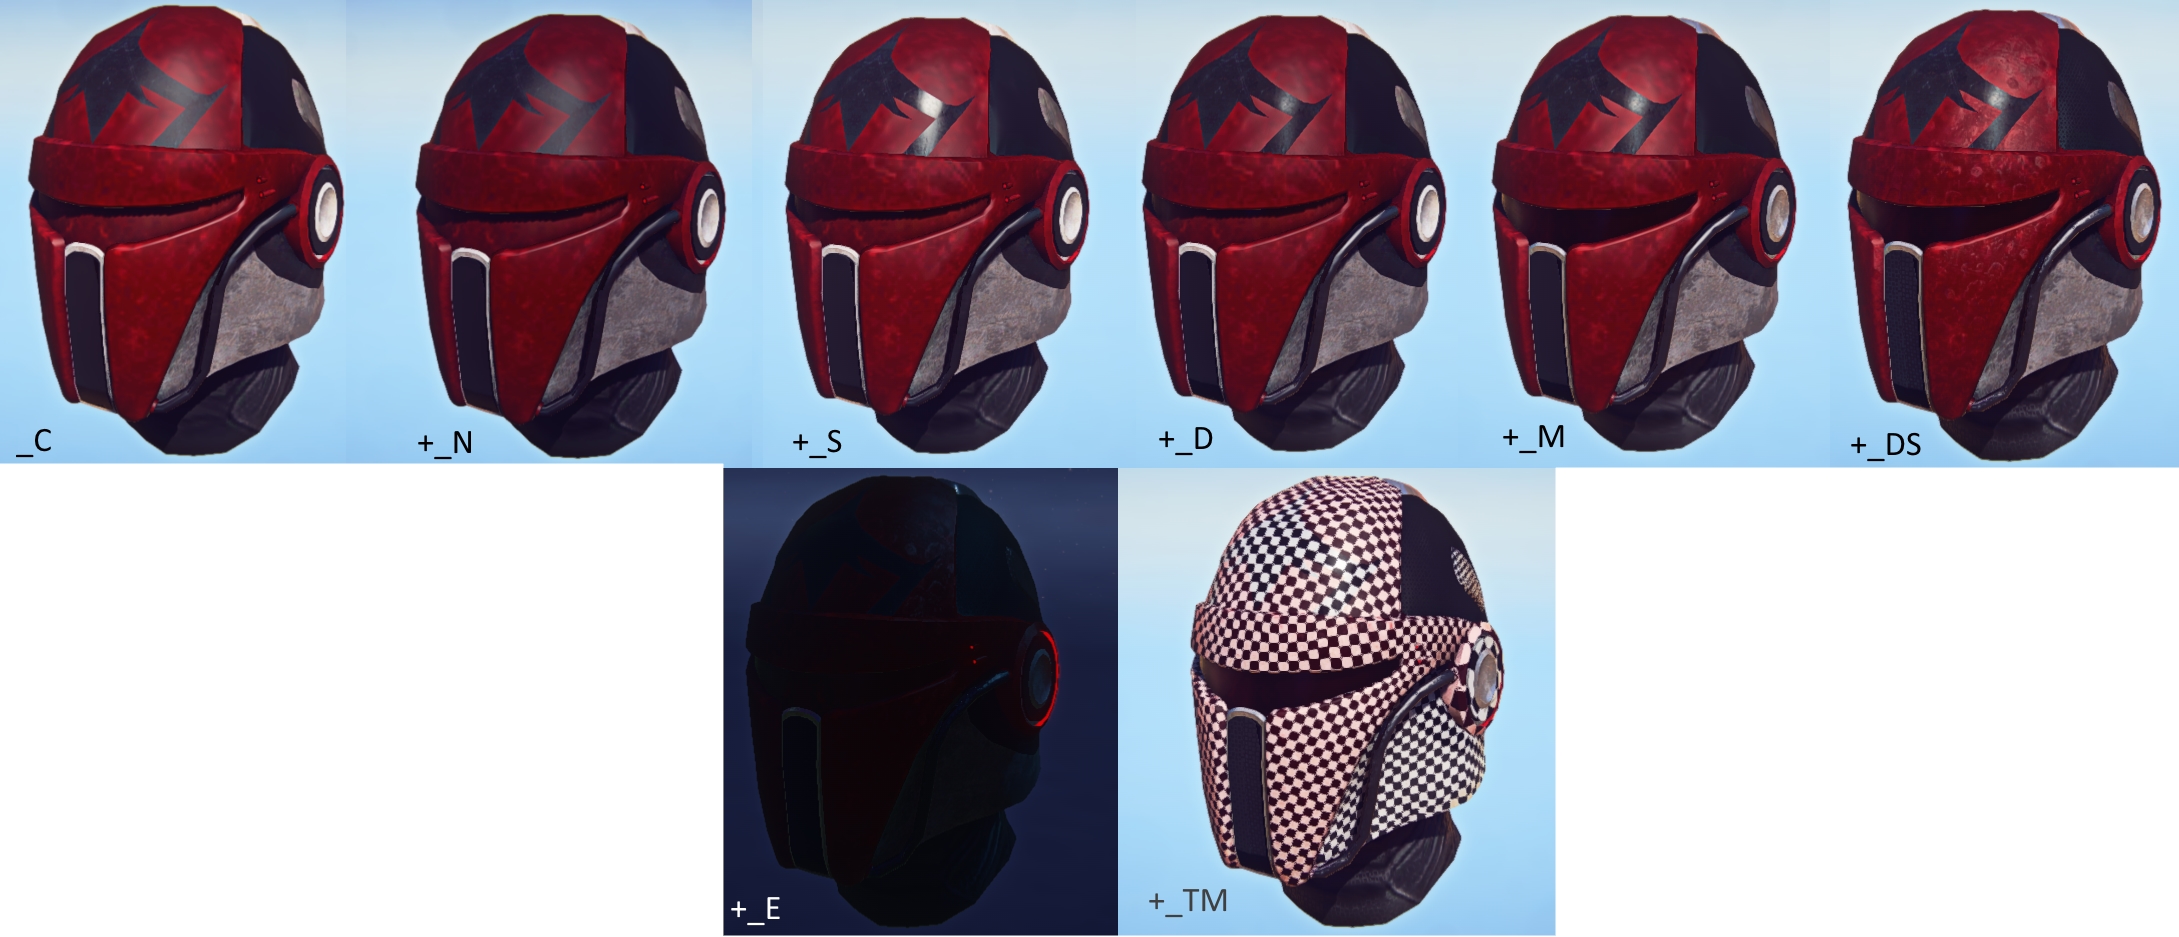
The following textures are used by the game, with the example of the base TR map:
_c (color)
Defines the color or tint of the geometry

_D (Glaze/Diffuse)
How the light diffuses or absorbs across textures, like plastic or glossed materials. These reflections are affected by the _S texture as well.
_E (Emmissive)
Also a glow map. These areas will glow in the dark.
_M (Metal/Metallic)
How much light is directly reflected, like a mirror or polished metal. The sharpness is controlled by the _S texture, and it is tinted by the _C.
_N (Normal/Bump)
Defines areas with details that are raised up from the texture in rendering. Usefull for small details without using geometry.

_S (Smooth/Shine)
Determines how “smooth” the texture appears, and how much it will reflect light, as well as how sharp the reflections are.
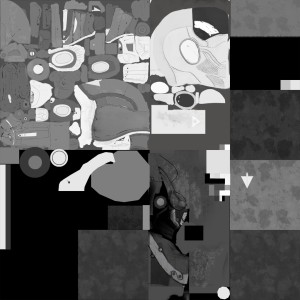
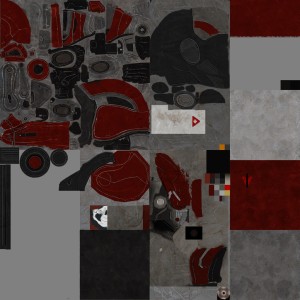
_TM (Tint Map/Camo)
Defines what areas will be effected by the camouflage texture or faction specific tint. Faction tint maps define white areas as the primary color, black as the secondary empire color, and gray as receiving no color. Note that helmets do not use faction tint, as they are already provided by the _C map.
_DS (Detail Select)
Detail Normals are small repeating textures that add detail to the geometry. They will be covered in detail below.
In use:
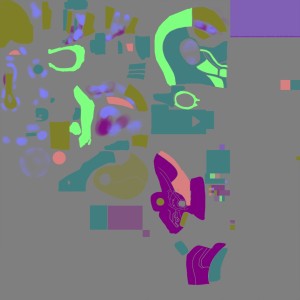
Detail Select
The detail select is a unique map, in that it actually controls an entirely different texture. These color swatches relate to a different type of detail pattern, which is repeated independently of the size of the swatch in UV 1.
The details vary by faction and item type, so while you can use the _DS map for refrence, sometimes trial and error is legitimate method of finding the right material.
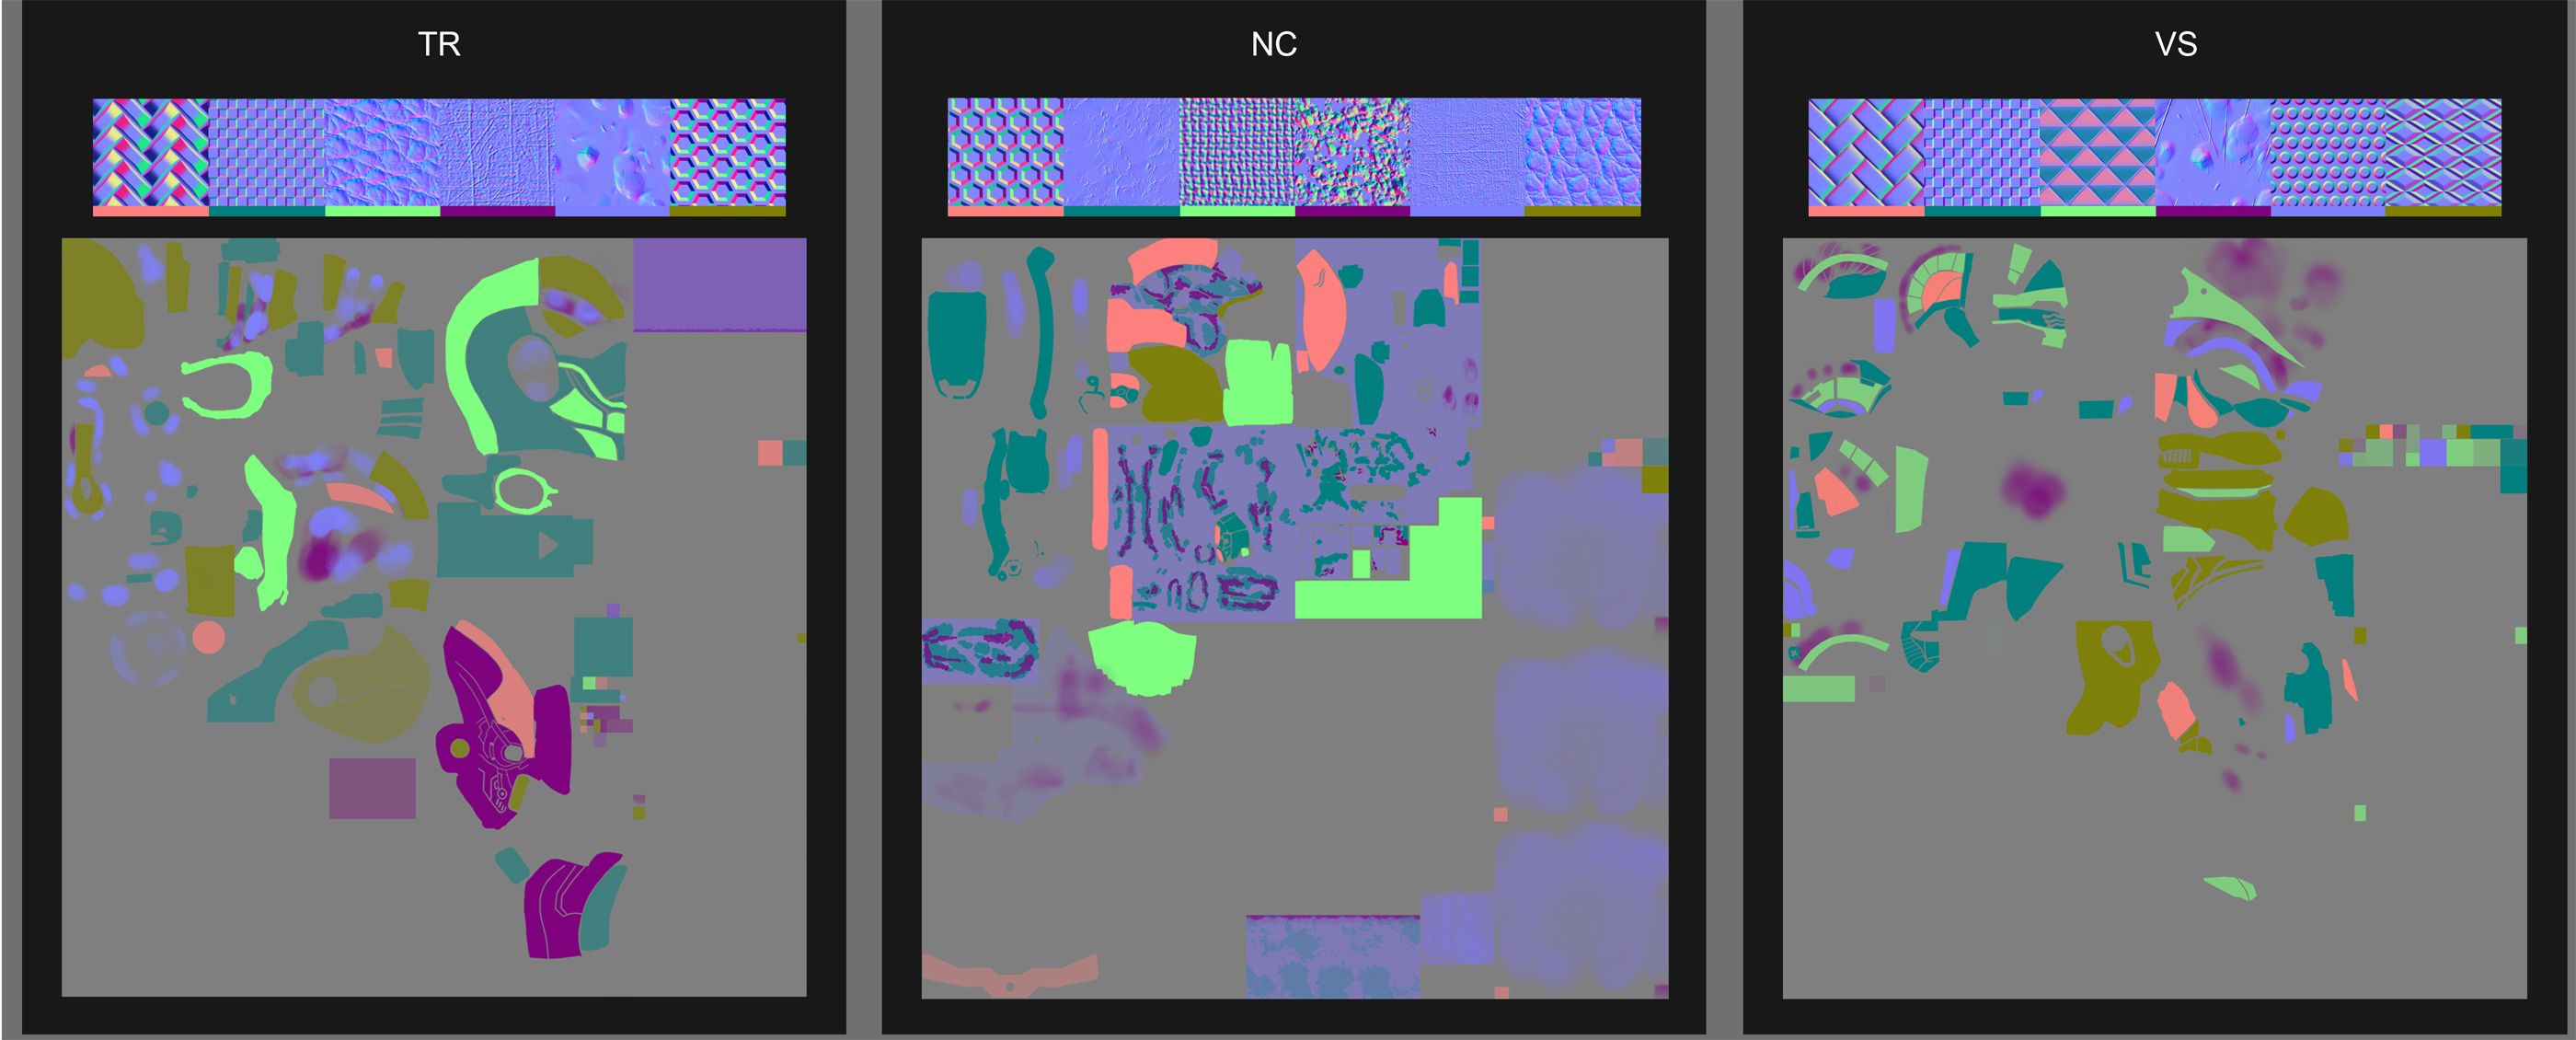
The following are the detail maps for the three factions headgear, taken from this thread by Steveo
Swatches
There are a few sections on the texture sheets that look like simple squares with a solid colors. These are the detail swatches. You can stack multiple UV islands on a single swatch, and maintain uniform appearance.
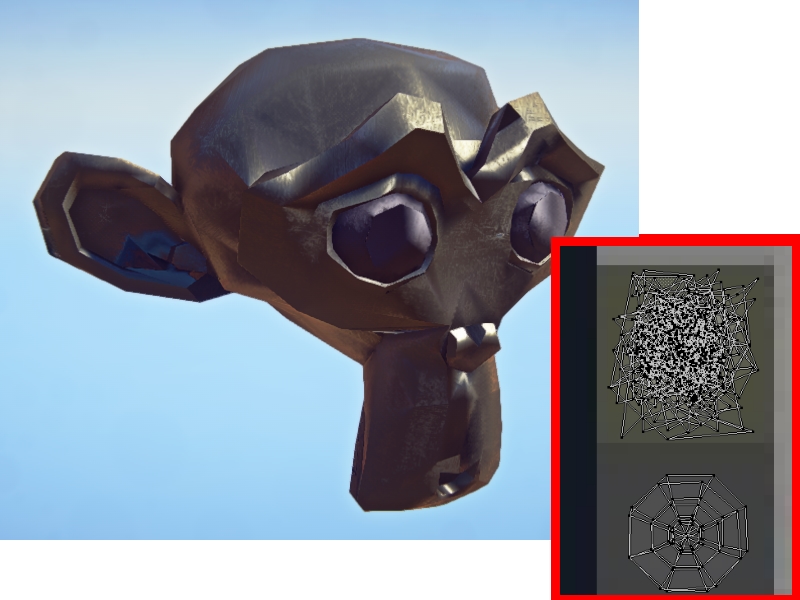
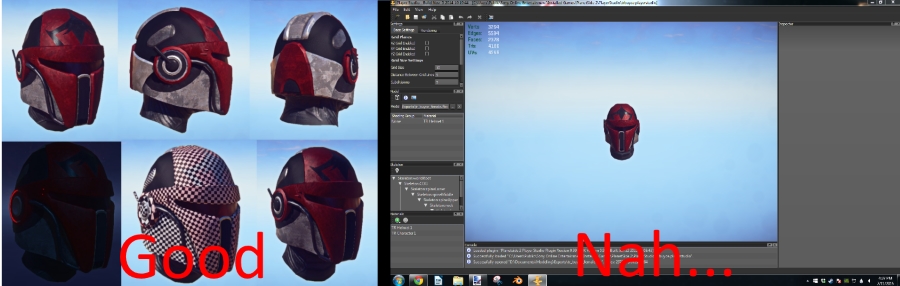
Note: You must take care to make sure that your islands are large enough. Sometimes, you can get odd results if your faces are too small, as seen below:
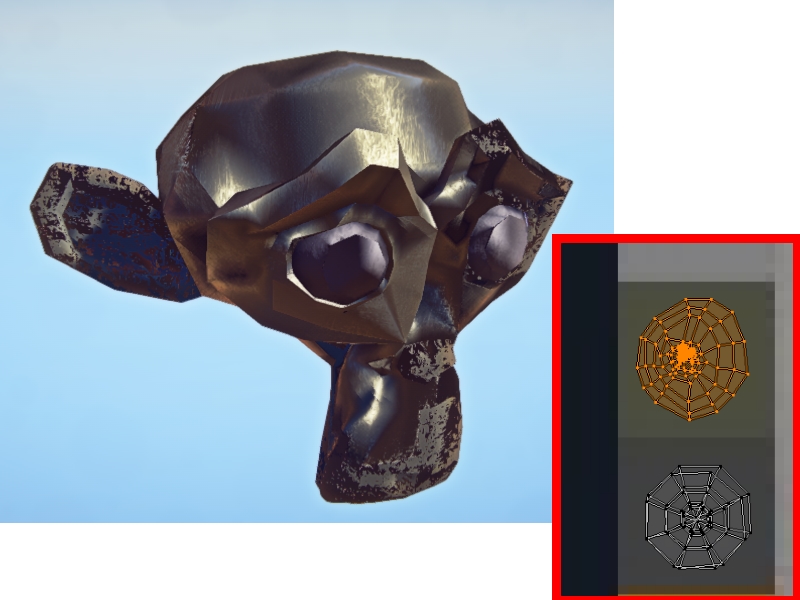
This can be corrected by separating the faces into smaller pieces, then scaling the smallest faces up, until uniformity is achieved. This can be done in blender by selecting the faces in the UV editor, then split with “Y”, then scaling and moving as necessary.
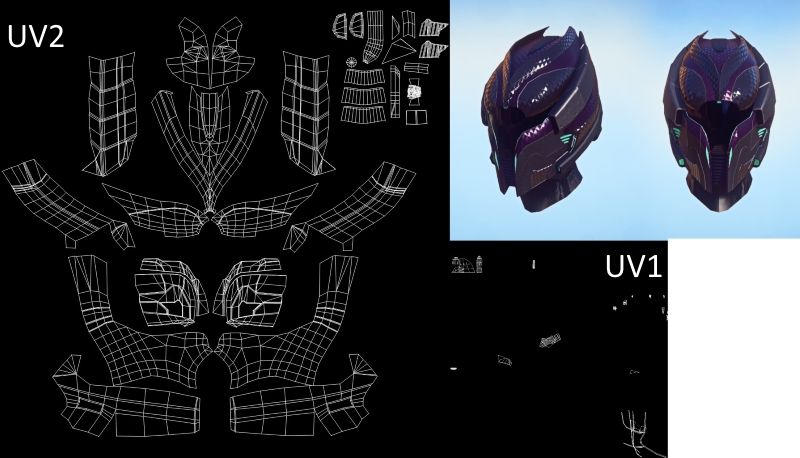
map2
The Important thing about UV 2 is scale and rotation, more so than position. It controls how much the detail select repeats/scales, and the scale and position of the camo. It is also very important that each UV be as flat as possible, and that nothing overlaps. That means no mirroring! I save this map usually for the very last before I move onto rigging.
Sample UV2 map by Bishop:
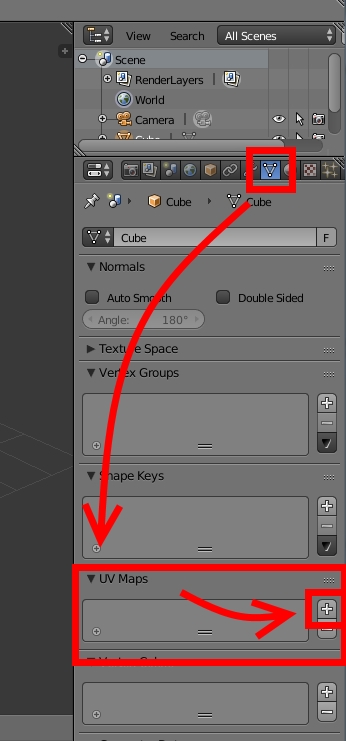
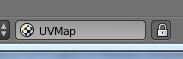
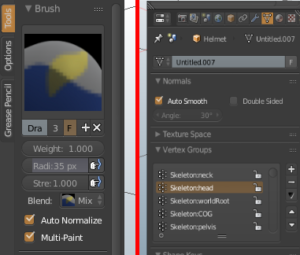
How to add multiple UV maps in Blender:
map3
A small note here on UV 3. This will be required by PSView, or it will throw an error. However, it is unused on helmets. It determines the placement of decals for use on armor or vehicles. For most cases, you can simply duplicate your UV 2.
Male/Female
You’ll notice in the example files that there is a listing for not just all the player races, but also a set of female heads. One of the things that iyou are also responsible for is submitting a helmet conformed to the head for both genders. (It’s not a horrible idea to test for the ethnicities as well, but unless you’re right up against the head, it’s not necessary. You still only need to submit a male/female version to DBG.)
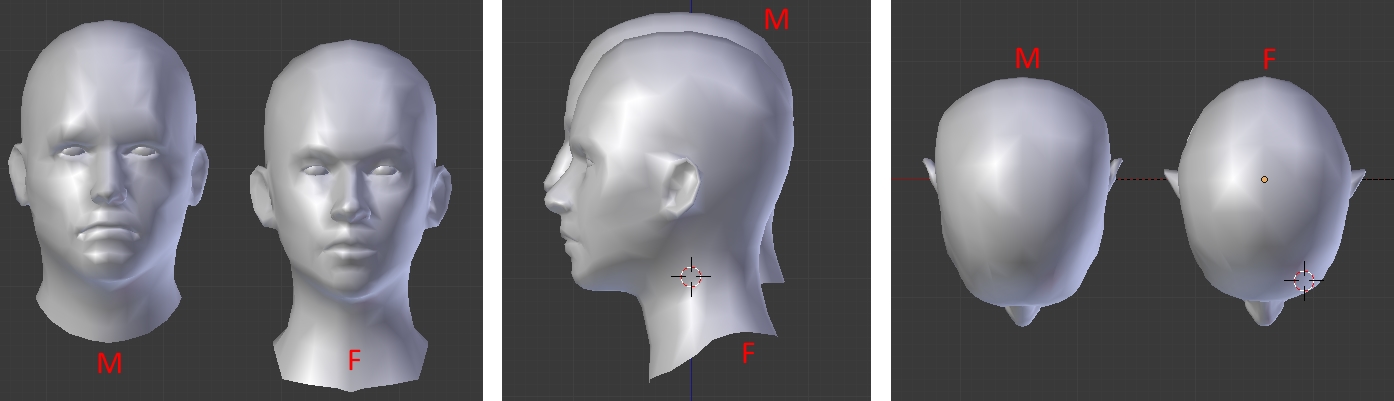
The major differences between the two is the neck, height, and skull shape. Personally, I find it easiest to build for the male, then re-form for the female version right before rigging/submission. Also, make sure you make copies of the individual files! If they ask for revisions, you’ll want to be able to roll back your changes.
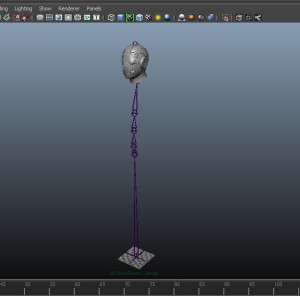
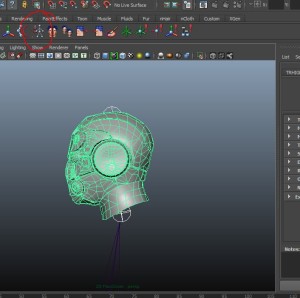
Rigging
Maya Instructions

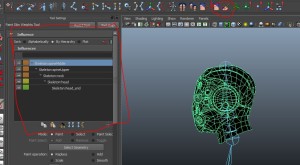
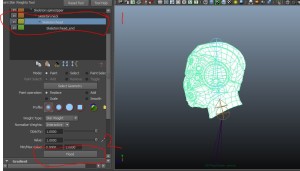
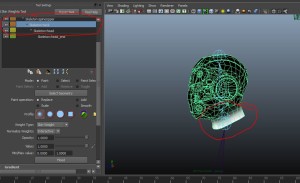
Finally, export as FBX.
Blender Instructions
Player Studio Viewer
PSview is a tool provided by DBG that allows us to both view our items in engine, as well as properly export them for use in game. It is included inside of the Planetside 2 Test Server installation. This includes PSview and the previously separate High Resolution texture packages.
To run, simply run the PSView application from Planetside 2 Test/PlayerStudio/PlayerStudio.exe.
The following image by EonNebula sums up the features of the PSView window.
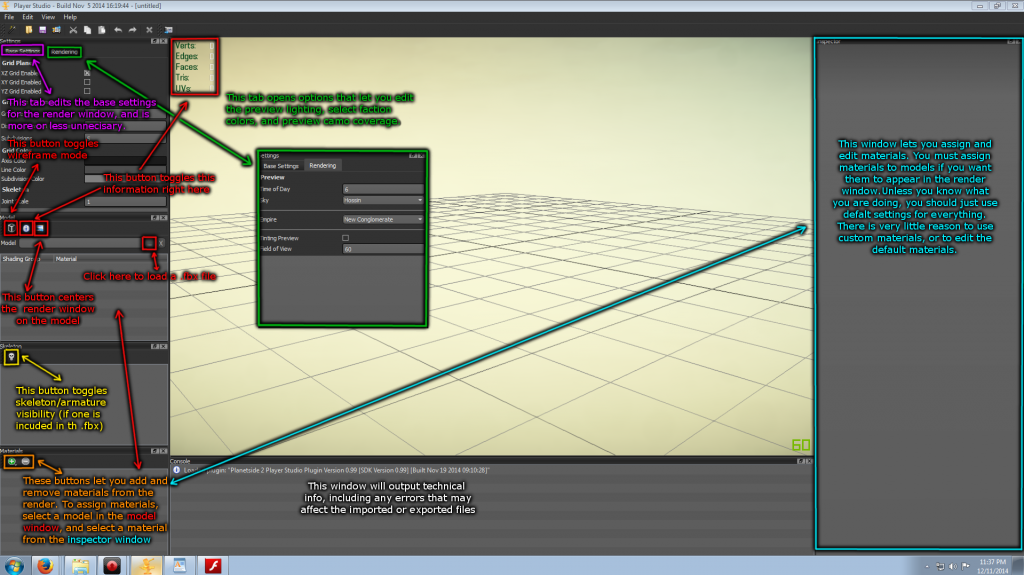
Load up your model in the viewer and take a look around. The controls are the same as maya, so you must hold the alt button to move the camera.
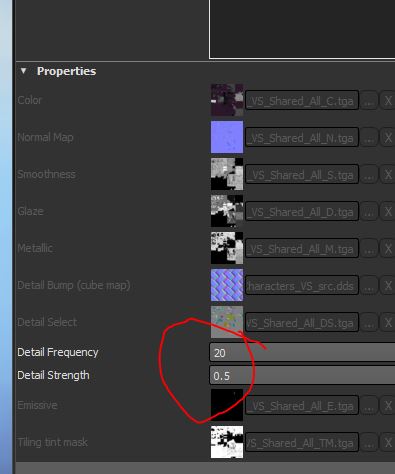
One thing to note, is that you should change the material setting if your detail normals are not showing up. Simply select the material, then adjust the detail strength and detail frequency values until you have a look you are happy with.
Finally, you can export as a .soepsx file, and you are completely done with your asset! Congratulations!
Blender Player Studio Viewer Export
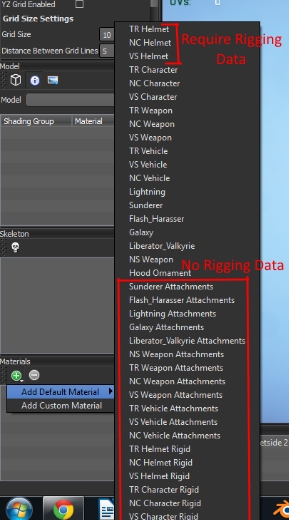
If you are having issue with rigging, please see the instructions below.
DBG has included “static” materials that will work without rigging data. So, all you have to do is export your model as an FBX in blender, with all three UV sets of course, and select a static material, and it will allow you to export successfully. From then on, the process is the same.
Now, while you are able to submit just fine without rigging your object, there is a few things to consider.
- If you rig yourself, you have full control over your item. What you send is 95% exactly the same as what goes in game. If you are particular, or have special areas that need specific settings (scarves, tubes, etc), rigging your own object lets you guarantee it looks how it should.
- Quicker processing once you submit. If you don’t do it, one of DBG’s artists must rig your piece, which can decrease how quickly it is accepted. (Nothing massive, mind you.)
Submission
So, you now have a completely modeled, textured, and rigged object exported through PSView as a .soepsx file. The final thing you’ll need is a preview image. This is what is looked at by DBG when they review your item initially. There are a few “best practice”s for this, mostly as a courtesy to DBG.
- Item only. Don’t just take a screenshot of your desktop with PSView open.
- Multiple angles. Try to get multiple angles of the item, ideally front, back, side, profile, etc.
- Preview tint and emmisive maps
So, now you have everything you’ll need! The next step is to submit the item to DBG for review. To do this, you’re going to head to the submission page. From there, simply fill out the form and upload your files. Press submit, and you can check your item’s status here. It’ll sit on “Processing” for a few minutes, and if all goes well, it’ll change to valid. You can then view a thread in the forums of your submission here. If it has an error, make that change and re-submit.
You will need to repeat this process for your male/female helmet versions. Make sure the .soepsx file names are different (_M/_F is fine), but the preview screen can be the same.
Side note: Make sure your empires match when filling out the character and server info! If you send a TR helmet to an NC character, you won’t get your free copy.
Approval Process
So, now what? Now, you wait. Over the next <insert time unit here>, DBG will look over your item and decide if they want it in game. During this time, the submission status page is your thread.
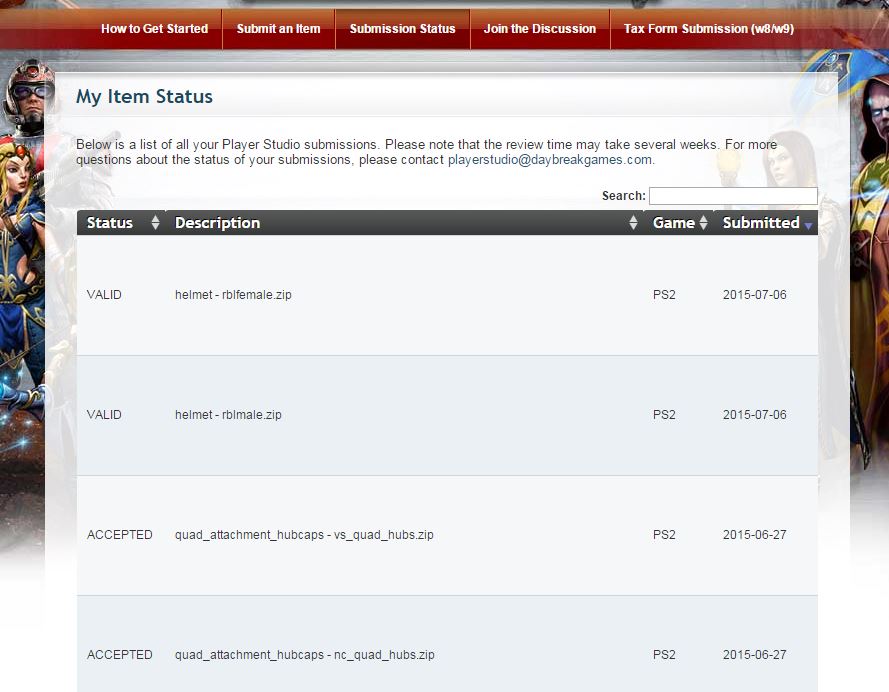
The “Status” Section can be at multiple stages.
- Processing- You just submitted the item, and the server is checking the file.
- Valid- You have uploaded a valid file.
- Accepted- The art team wants your item, but hasn’t done anything else.
- Pending Finance- You’ll need to fill out the tax forms before any more work can be done. (I’d like to help with this more, but unfortunately it’s been a while. It seems to be pretty easy as long as you follow DBG’s guidelines.) Also note that you only have to do this the first time that you get an item accepted. Once you’re on file, you shouldn’t need to fill out the paperwork again.
- Declined- For whatever reason, the item has been declined. There will usually (but not always) be a note as to why.
- Declined/Revisions requested- If there is something that needs to be changed before they accept the item, there will be a note.
Note: You can re-submit your itemas many times as you want before that status moves to completed, but be sure that you differentiate in your file names (add a _v2, or _r2, for instance.)
Completed and Beyond
Once an item has been Completed, it is generally in the game files. However, there are many other things needed before it is in game.
- Icons
- Itemization
- Locale files
Watch the Unofficial Patch notes to keep track of this progress if you want. The time from completion to in game varies based on market saturation, dev speed, and a few other things. It has taken anywhere from a few weeks to multiple months for me.
Once the item is ready and in game, it will show up in the marketplace, usually with a “Coming soon” tag. When Marketing decides it should release, it will be available for purchase! You’ll get a better idea on the actual release when the timer shows up next to “Coming Soon,” usually about 2 weeks out.
Support will grant you a free copy of your item to the character you specified when you submitted it. The time this takes varies, but try to wait at least a week after the patch drops before requesting it through a ticket.
Finance
It’s payday! Or it will be, in about 4 months. :p
Items that you send to DBG are licensed from you, and you get a 40% cut of the gross sales of your items. So, if you sell a helmet for $10, and you sell 100 of them, it makes a gross of $1,000, which you make $400 from. (Minus taxes and whatnot)
Checks are calculated quarterly, and are sent out the month after the quarter. So, the quarter from January to March is calculated during April, and checks are sent out during the first week of May. April-June, sent out first week of August. And so on. Basically, you’ll get a check every three months.
Checks will only be sent out if there is a minimum of $15 in them, except for once a year, where the minimum if $5.